
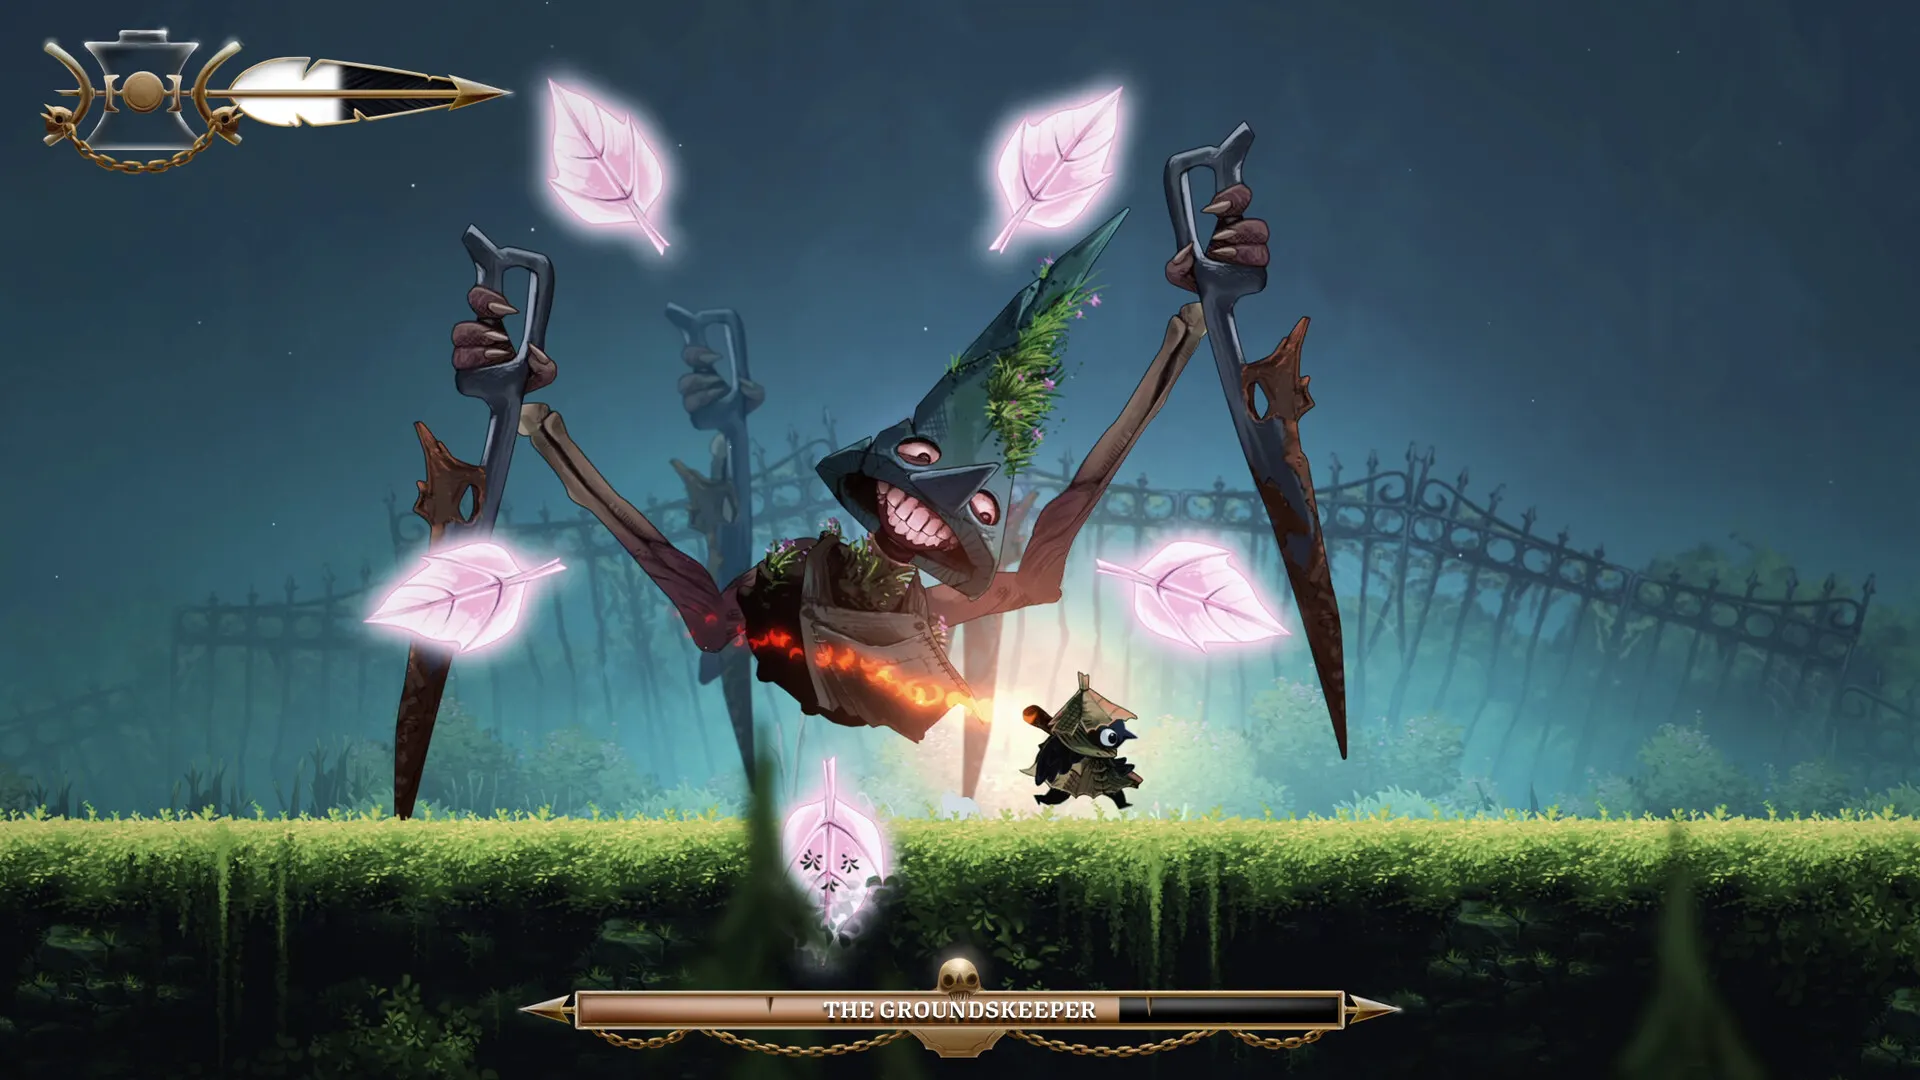
These are the three fights that carry Well Dweller from the well to the bottom of the kingdom, and each one teaches a habit the rest of the game expects: slide timing against the Groundskeeper, attacking upwards against the Swarm, and dodging terrain against the Lady of the Drains.
The page covers the attack lists, the phase changes and what each fight actually unlocks. Two of them hand over abilities rather than achievements, which is why they cannot be skipped.
The Groundskeeper boss fight
The Groundskeeper is the first boss in Well Dweller and the one that teaches the game's core defensive habit: slide, do not jump. Every attack it has is designed to punish a jump and to be beaten by a well-timed slide.
It is also a fight you can re-learn cheaply - the arena sits directly to the right of a safe tent, so a death costs you a short walk.
Before the fight
- Save at the tent, then go right instead of back toward the well.
- A cutscene plays and the boss comes to you; entering the arena is the trigger.
- Walking in front of him does no damage. Only the attacks hurt, so positioning aggressively is fine.
Attack list
| Attack | What happens | How to beat it |
|---|---|---|
| Seed volley | He fires a spread of seeds that drift down toward the ground | Keep moving; he starts the next attack before the seeds vanish, so never stand still |
| Rakes | Rakes launch one at a time in quick succession, usually right then left, repeatedly | Slide through them - they are too tall to jump over |
| Leaf storm | Leaves appear and surround you as he stomps left to right and back again | Slide through the leaves; this is deliberate practice for phase two |
| Smash shockwave (phase two) | He slams down and fires a shockwave along the floor | Slide through it, but do not slide early - the wave is longer than it looks |
The half-health phase change
At roughly 50% health the music changes and the fight tightens up:
- more seeds and rakes per volley,
- the leaf attack doubles its leaves, so jumping through them stops being survivable.
Nothing new appears in the moveset - the same four attacks just get denser. If your healing is on cooldown, that is the moment to back off rather than trade hits.
Sliding, healing and the timing check
Two mechanics decide this fight more than damage output:
- Slide timing. The rake volleys alternate sides, so the correct rhythm is to slide on the attack, not on reaction to the first rake leaving the screen.
- Healing is a timed minigame. You hold the heal input and release when the moving marker lines up with the lit section of the matchstick. Missing it means no heal, but no lost vial - you can retry immediately, so there is no reason to panic-heal. If the window keeps slipping, the Hunter's Locket trinket widens it (it comes later, from inside the Hunter's Cabin), and the assist menu can replace the timing check with a simple hold.
Rewards and what comes next
Defeating The Groundskeeper awards the Dark Garden achievement (14G on the achievement list - one of the odd Gamerscore values in this game). No ability comes from this fight; the first movement upgrade, Slingshot, is inside the Hunter's Cabin.
After the kill, continue into the cabin rather than back into Night Garden. The high ledges and locked passages you passed on the way are not reachable yet - see Well Dweller Night Garden and Hunter's Cabin walkthrough.
The Swarm boss fight
The Swarm is the second boss in Well Dweller and the one that forces you to change where you look. It hovers above Glimmer for most of the fight, so the whole encounter is played with upward attacks and mid-air swings while you dodge ground-level waves.
It also drops the ability egg containing Climb, which is the upgrade that turns the rest of the map into a climbable space - so this fight is a progression gate, not optional content.
Where it is
The Swarm lives in The Bog, and you reach it shortly after the room where access to Queen's Castle is fenced off and the game tells you to come back with seven Golden Feathers. If you have met Ilda and seen the castle gate, you are on the right route.
Attack list
| Attack | What happens | How to beat it |
|---|---|---|
| Thrown projectiles | It lobs projectiles at you while it moves | Keep attacking upward between throws; do not commit to a long ground combo |
| Projectile barrier | It surrounds itself with projectiles | Stay clear until it throws them, then punish |
| Bug wave from the right | A wave of bugs sweeps in from the right side of the screen, forming a barrier | Jump over it using the bubbles in the arena as extra height |
| Ground-pound shockwave (skull phase) | The skull it retrieves adds a slam that sends a shockwave along the floor | Slide or dash through the line after the attack commits - not before |
| Ground-level charges (final phase) | Single bugs appear at ground level on the left and right and fly straight at you | Slide dodge or jump over them, depending on what else is happening |
The two phase changes
Just before half health: the bugs fly into the background and bring back a skull, which then controls the fight. This is a gift - the skull is an easier target than the swarm, and the moveset stays largely the same, with one addition: a ground-pound that produces a floor shockwave. Switch your damage to the skull when it is available.
At a quarter health left: the music speeds up and attacks intensify. The notable addition is ground-level charges from both sides. The pacing mistake here is trying to slide every charge - the slide has a cooldown, so alternate between sliding and jumping instead.
Rewards: Climb and Tent Travel
- Defeating The Swarm awards the Buggy Business achievement.
- The ability egg after the fight contains Climb: hold jump against a wall to cling and climb, draining a wing-shaped stamina meter that refills on solid ground. Tall shafts are designed for alternating between opposite walls.
- Backtracking with Climb toward the Night Garden tent unlocks Tent Travel, which lets you pick discovered tents from the map. That single upgrade makes the rest of the game dramatically cheaper to clean up.
Both are covered in sequence on Well Dweller The Bog walkthrough.
Lady of the Drains boss fight
The Lady of the Drains is the boss at the bottom of the region's broken elevator, and she is the first fight in Well Dweller where the arena itself attacks you. The platform is moving, spikes sit below it, and she spends part of the fight invisible while you dodge terrain instead of her.
Beating her awards one of the seven Golden Feathers the Queen's Castle gate checks, which makes this encounter a soft prerequisite for the endgame.
Getting there
You need all 3 Elevator Parts before the lift will move - there is no bypass switch and no partial activation at 1/3 or 2/3. The elevator itself sits directly to the left of the tent in the centre of the level, and the fight begins as it descends.
Two prep steps worth doing first:
- Save and refill at the tent before riding. Oil Vials refill at safe points, and you cannot leave mid-descent.
- If you are still missing a part, the route layers are listed on Well Dweller Elevator Parts: all 3 locations.
Attack list
| Attack | What happens | How to beat it |
|---|---|---|
| Thrown spike balls | She throws spiked projectiles from above | She hovers above you, so aim up or attack mid-air; wait for the opening instead of forcing one |
| Spinning spikes | She surrounds herself with rotating spikes | Do not attack into it. Wait it out |
| Spawned enemy | She occasionally spawns an enemy that uses a ground-pound shockwave | Kill it first. It is described as the most distracting part of the fight |
| Disappear and rise | She vanishes and the screen rises as spike balls appear from below | Pure dodging section: use the slide, mind its cooldown, and do not try to attack |
The tell worth learning
Her face opens before the lightning attack. That animation is the cue to move, not the strike itself. Two habits cause most of the deaths here:
- jumping after the tell has already started,
- escaping one attack by landing directly on spikes, which turns one mistake into two hits.
The steady version of the fight is: watch her, not the floor; move on the face-open animation; land somewhere safe before attacking; use the quiet windows for damage and healing.
Flaming Vessel and healing discipline
The Flaming Vessel is strong here, but save it for after an attack finishes. The commonly listed mistakes are all rhythm errors: throwing the vessel or healing while a movement correction is still needed, then taking a hit that cancels the heal.
Rewards
- One Golden Feather, one of the seven sources listed on Well Dweller Golden Feathers: all 7 sources.
- A defeat achievement: Down the Drain.
You do not need to run back to Queen's Castle immediately. Continue working through the remaining Feather objectives; the gate only checks the total.
Name check
- The in-game boss health bar reads LADY OF THE DRAINS, matching every guide we checked.
- The defeat achievement is Down the Drain on the published Steam achievement list.
Sources
| What this page states | Where it comes from | Status |
|---|---|---|
| The Groundskeeper - Attack list, half-health phase change, slide-first strategy | Gamer Social Club Groundskeeper guide, September 21, 2026 | Source-linked; single-source strategy, not tested here |
| The Groundskeeper - Boss name spelled "The Groundskeeper" | Official in-game boss health bar in the Steam screenshot used on this page | Confirmed |
| The Groundskeeper - Location, arena trigger, tent save point | Gamer Social Club guide and whisperofthehouse.com Night Garden walkthrough | Cross-checked |
| The Groundskeeper - Dark Garden achievement, 14G | NiaMeowDB achievements | Cross-checked |
| The Groundskeeper - Boss bar name | Official in-game boss health bar (Steam screenshot) | Confirmed |
| The Swarm - Attack list, phase changes at just-before-half and quarter health, skull target | Gamer Social Club Swarm guide, September 21, 2026 | Source-linked; single-source strategy, not tested here |
| The Swarm - Location in The Bog, arrival after the castle gate room | Gamer Social Club guide and whisperofthehouse.com Bog walkthrough | Cross-checked |
| The Swarm - Climb mechanics, Tent Travel unlock, Buggy Business achievement | whisperofthehouse.com Bog walkthrough | Source-linked |
| The Swarm - Slide/dash caveat and the long ground wave | whisperofthehouse.com Bog walkthrough | Cross-checked against the Gamer Social Club attack list |
| Lady of the Drains - Arena on the descending elevator, spike balls, spinning spikes, spawned enemy, disappear-and-rise section | Gamer Social Club Lady of the Drains guide | Source-linked |
| Lady of the Drains - Face-open lightning tell, dodge discipline, three common mistakes, Golden Feather reward | whisperofthehouse.com The Drains walkthrough | Source-linked |
| Lady of the Drains - Elevator position relative to the tent, 3-part requirement | Gamer Social Club guide and whisperofthehouse.com | Cross-checked |
| Lady of the Drains - Boss name | Official in-game boss health bar in the Steam screenshot on this page | Confirmed |
| Lady of the Drains - Defeat achievement name | Steam Community achievement list | Confirmed |
Still unpublished:
- The Groundskeeper: Not yet checked on this site: exact health values, damage numbers and whether the boss has any attack order RNG worth memorising. No numeric stats are published by any source we could cite, so we publish none.
- The Swarm: Not yet checked on this site: whether the bug waves can be skipped with later movement abilities, and whether the skull can be destroyed early. Both need a release-build run before we state them.
- Lady of the Drains: Not yet checked on this site: whether the disappearing sections are timed or damage-gated, and whether trinket loadouts change the pacing. Both need a recorded run.